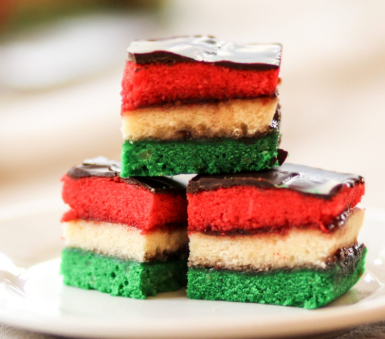
Italian Rainbow Cookies
RECIPE :- 4 large eggs, separated
- 1 cup sugar, divided
- 1 8-ounce can almond paste
- 1 1/4 cups (2 1/2 sticks) unsalted butter, softened
- 1/2 teaspoon almond extract
- 2 cups all-purpose flour
- 1/2 teaspoon salt
- 1 drop Red food coloring
- 1 drop Green food coloring
- 10 ounces raspberry preserves, warmed
- 7 ounces dark chocolate melting wafers
- Position a rack in the middle of the oven and preheat to 350° F. Grease, flour, and line the bottoms of three 9- by 13- by 2-inch (quarter sheet pan) with wax paper, leaving a 2-inch overhang.
- In the bowl of a standard electric mixer fitted with the whisk attachment, beat egg whites at medium-high speed until they just hold stiff peaks. With the mixer running on high speed, add 1/4 cup sugar a little at a time, beating until whites hold stiff, glossy peaks. Transfer to another bowl, and wipe the bowl dry with a paper towel.
- Switch the mixer to the paddle attachment and beat together the almond paste and remaining 3/4 cup sugar until well-mixed, about 3 minutes. Add butter and beat until pale and fluffy, about 3 minutes. Add yolks and almond extract and beat until well combined, about 2 minutes. Reduce speed to low, then add flour and salt, mixing until just combined.
- Fold half of egg white mixture into almond mixture to lighten, then fold in remaining whites gently but thoroughly.
- Divide batter among 3 bowls. Stir red food coloring into one bowl and green food coloring into another, leaving the third bowl plain. Keep in mind that the batter will bake up darker than it looks pre-bake. Pour the batter from one of the bowls into one of the prepared pans. Using an offset spatula, spread the batter into an even layer.
- Bake the layer for 8 to 10 minutes, until just set (the cake may look undercooked, but this is what you want). Repeat with the remaining bowls of cake batter and sheet pans, transferring each baked cake to a wire rack to cool completely.
- When all the layers are cool, invert the green layer onto a parchment- or wax paper-lined baking sheet (I like to use one of the cooled quarter sheet pans for this). Peel off the paper from the layer and brush on half of the heated preserves. Flip the white layer on top of green layer and peel off the paper. Spread with remaining preserves. Invert the red layer on top of white layer and discard the paper.
- Cover tightly with plastic wrap and place another quarter sheet pan on top, right side up. Evenly distribute a heavy weight on top of the sheet pan (2 bags of flour is what I usually go for) and place in the fridge to chill for at least 8 hours or overnight.
- Remove the weights and plastic wrap and let the layer sit on your counter for a few minutes to come to room temperature. Melt the chocolate wafers in a microwave-safe bowl in 30-second increments, until smooth.
- Trim the edges of the assembled layers with a long serrated knife to even them out. Quickly spread half of the melted chocolate in a thin layer on top of cake. Place the cake back in the fridge to firm up the chocolate, about 10 to 15 minutes. Place a sheet of wax paper on top of the chocolate layer, place another quarter sheet pan on top, then invert the cake and remove the paper. Quickly spread with the remaining chocolate. Freeze the chocolate-covered cake until firm.
- Cut lengthwise into 6 strips, and then cut each strip crosswise into 16 pieces. I like to use a sharp serrated knife that has been run under hot water to cut into the frozen cake. The cookies are MUCH easier to cut when the big cake is cold, so don't try to cut the it at room temperature—you'll just end up making a mess and having a really hard time.
- The cookies can be stored in an airtight container in the fridge or freezer; I like to keep them in a large flat container and layer the cookies with a sheet of wax paper in between to keep them from sticking. The cookies will keep in the fridge or freezer for a long time and are delicious when they're slightly chilled.
Court Street Pastry Shop
Carroll Gardens , Brooklyn
New York


